Showing posts with label Jewelry. Show all posts

Tuesday, June 23, 2015

Swarovski Flower Drop Back Earring | DIY


Hey there!
In today's post, I will show you how to DIY these  earrings - sparkling at the front AND from the back as well. This type of earring became popular last year and has been hyped a lot (at least that's how I saw it). Last year, when I visited my family and my native country Korea, I've seen those earrings everywhere and I've also bought myself a pair. They were just different and something new. I really like the pair I have, but I wished that I would have more of them...So, I was thinking that it couldn't be that hard to craft them (and it's so so so easy!). Read on below to verify it yourself!

1. What you need: 2 headpins, a pair of earrings, 2 beads (I chose two swarovski flower pearls), jewelry pliers (not seen above)
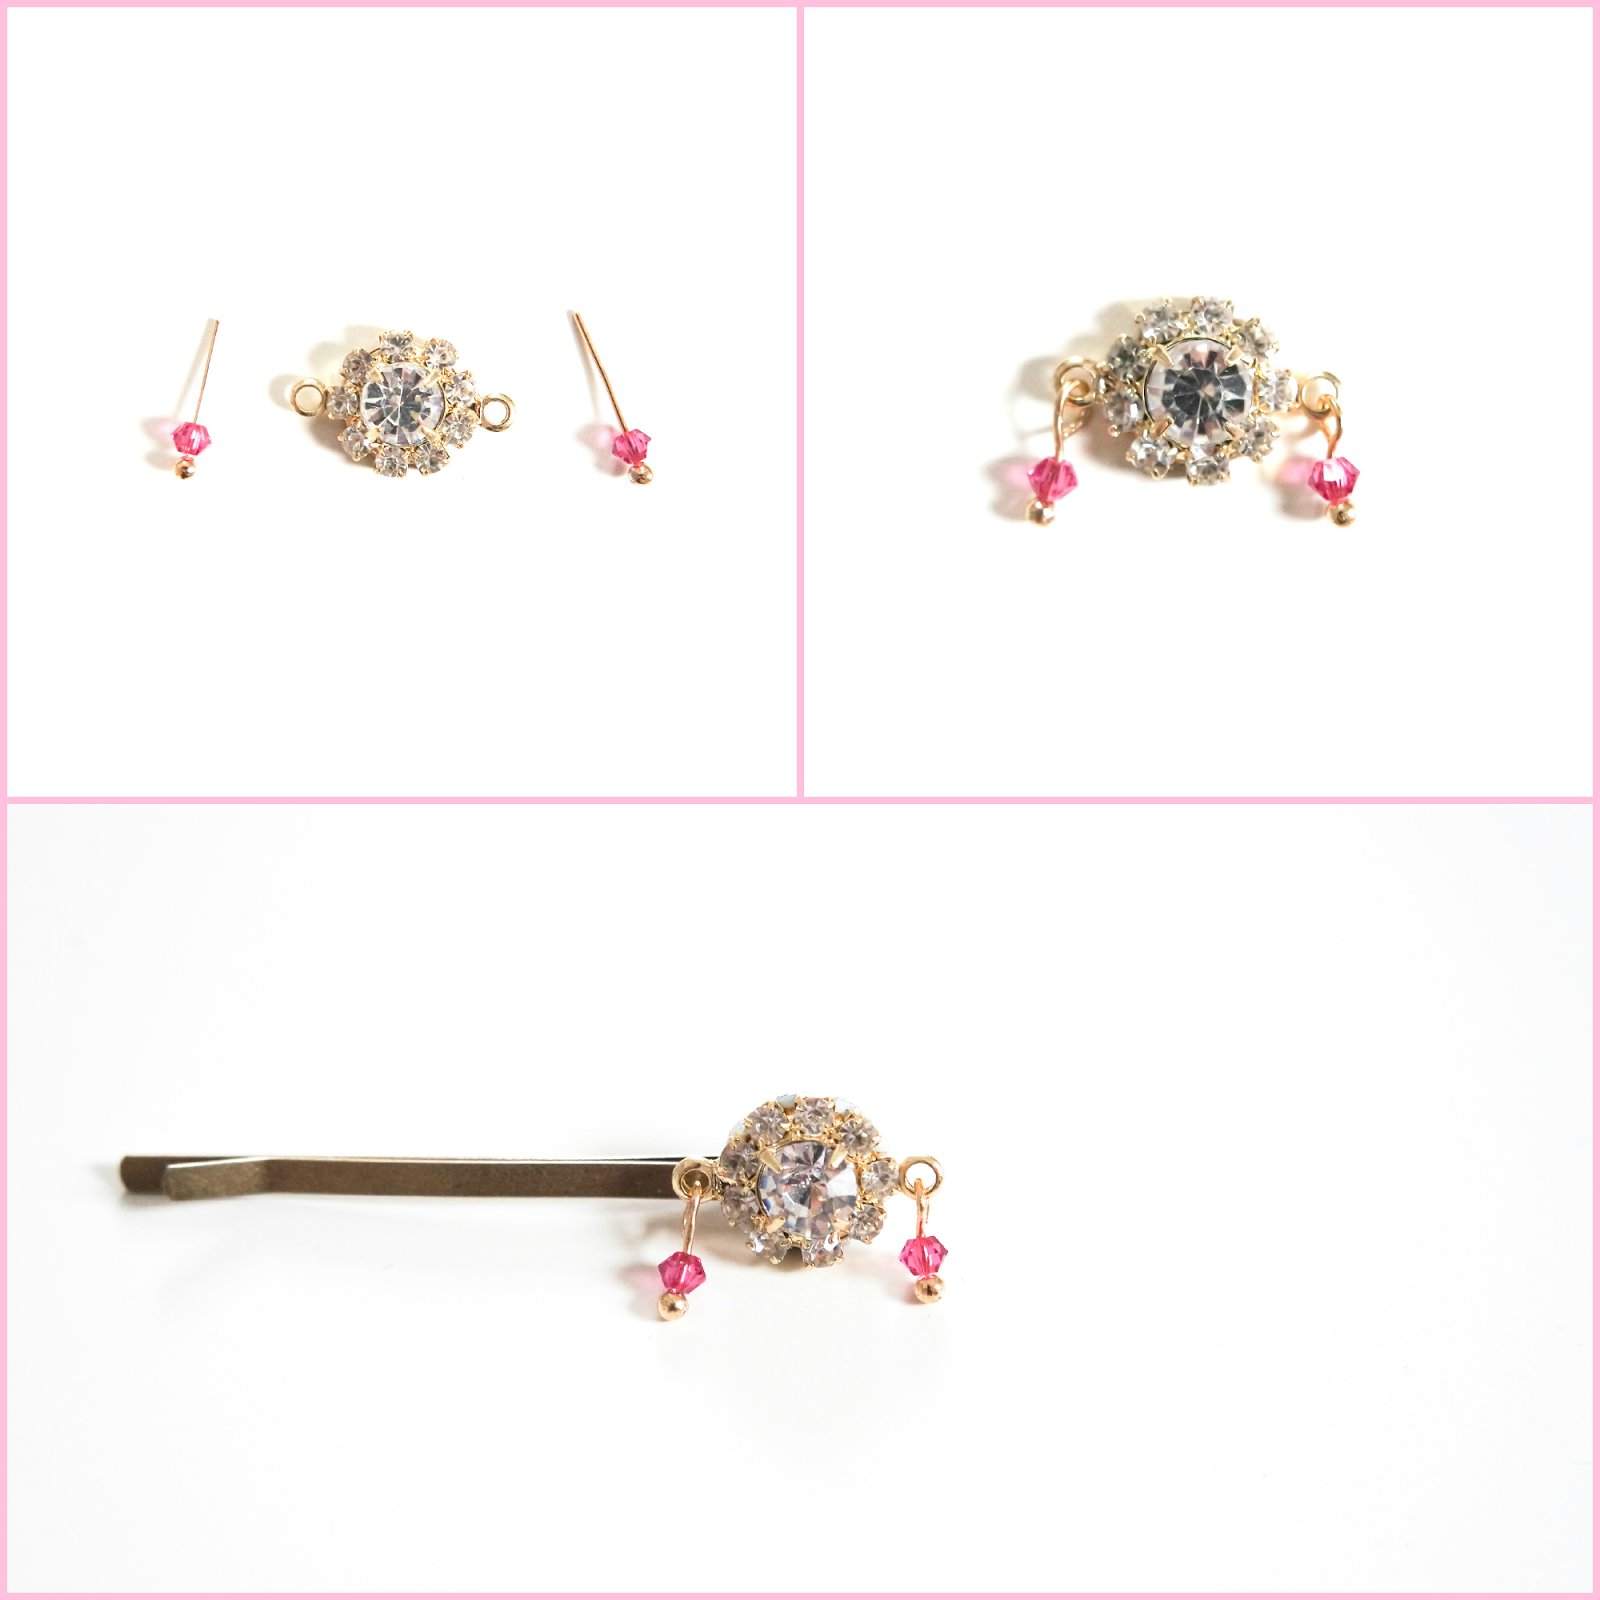
2. Start by slipping the bead onto the headpin.
3. Take your jewelry pliers and bend the headpin upward. Leave a small space between the curve and the bead (for your ear).
4. Now, create a tiny loop at the end (you don't want your backside to be too long, so clip off the lenght of your headpin according to your preference).
5. All complete! Ready to wear?

Ta-dah! Brighten up your face and your day with this sparkling and cute earring! ~Shine brighter  than a diamond...~
 
And? Easy, right? I always feel so satisfied and happy when I craft something - do you also know this feeling?

Wednesday, April 29, 2015

Quick DIY: Cheery Bonbon Bauble

Hello everyone!
Hach, do you know this feeling? This bubbling inside your tummy and the smile that appears on your face? I'm in that state of mind when I look down at my wrist and see this playful, colorful and yet très chic bracelet! Somehow it feels like it has been some time since I've last crafted a bracelet, so I'm all the more excited to share with you my new favourite acquirement!

What I used:
rhinestone chain
eyepins
lobster claw
jump rings
beads
(mini-tassel)

I've started by inserting eyepins into every bead and creating little loops at the ends.
Then, I attached all the beads together.
I also added the rhinestone chain and linked both parts.
Ta-dah! In fact it's finished but...
...I decided to add a tiny tassel as a mini-eyecatcher!

Phew, I'm really happy right now! The final result is very likeable and this bauble reflects my personality (in a way). Sometimes I wanna be subtle & classy, but sometimes I just wanna enjoy life in the most joyful & cheerful way possible!

This was a very easy and quick DIY, right? What are your impressions? Do you also have a split-personality like I do? You're welcome to leave comments down below! (By the way, those beads remind me of sweets!)

Saturday, April 11, 2015

DIOR "Mise en Dior" | Marbled Clay Edition

I've already seen a few variations of DIOR's "Mise en Dior" earrings, but they were all about drilling holes into beads and embedding rubber earring backs. (Those of you who don't know them: They have a smaller pearl at the front and a bigger one behind the lobe - it's their characteristic trait). For me, honestly, this way seemed a bit hard since I'm not familiar with using a drill and there was this slight possibility of accidentally breaking your precious pearls. I've wanted to try a new and safer method so I experimented around a bit and I finally came up with a different version: Why not use clay? That's why I will share with you an alternative to create equally beautiful earrings.
Let's begin!
 

Materials:
Pair of earrings
Clay (air-dry)
Nail polish (I wanted to keep it classic so I've used black and white)
Tissue
Toothpicks
Bowl with water

Step-by-Step:
Okay, start with forming 4 balls out of the clay clump. 2 smaller ones and 2 bigger ones for the back.
Insert the front side of the earrings into the 2 smaller balls. Do the same with the 2 bigger balls by inserting the screw backs into them. Let them air-dry.
After they've air-dried (I let them air-dry over the night, but a few hours suffice), drip a couple of nail polish drops into a bowl filled with water. Take a toothpick to swirl the surface (marbling effect!).
Now take one part of the earring and dip it in. Repeat this step with every part of the earrings. (Tip: Since the bigger balls don't have an attached stick, just poke a needle inside them to get a hold of them).

Ta-dah! You are finished!
What do you think of this method? I personally like the marbling effect a lot, I think it looks more 'unique' but that's just my opinion! (The balls didn't end up to be perfectly round but because of the marbling it doesn't stand out that much, fortunately!)

Sunday, March 01, 2015

Bejeweled Hair Pin

I haven't worn a hair pin in a long time. When I was in grade school, I wouldn't dare to go out without one. By now, you should probably know that I like everything that *blings* and shines. I mean, is there a girl out there who doesn't like to add a little sparkle which would complement her outfit? (Well, it could be that I'm a bit strong-minded in this field...). Nonetheless, today I want to show you that hair pins aren't only limited to little children wearing them with fancy patterns, but that they can also be worn as stylish accessories and everyday companions in your hair.
For this petite pin, I only needed one bigger jewel with loops, 2 ballpins and 2 swarovski beads in fuchsia. I attached the ballpins with the swarovski beads to the bigger jewel, then glued it to the hair pin. Finished!
 
Isn't this sooo simple? You can whip up a variety of different hair pins in seconds and you will have a whole collection!
See? Hair pins aren't either old school nor limited to children. With the right materials and the right combinations, they transform into your most loved accessory.
Don't you feel the urge to give it a try, too?


Saturday, February 21, 2015

Flower Earring | Spring | DIY


 Here in Germany, it's slowly getting warmer and the sun comes out more often (even though the weather forecast said that it will get colder soon...). Whatever, to celebrate this fresh breeze of springlike feeling, I want to share a DIY that's equally 'fresh' and easy to make and that will make you instantly feel lighter and jauntier!
 
 
Materials:
Earrings (mine had a rhinestone attached)
Silver bead caps x 2
Nail polish (Essie 'let it shine' Topcoat / Essie 'bikini so teeny')
Glue
Tissue
 
Step-by-Step:
Start off by placing the tissue paper onto your work place.
Take one bead cap and paint it in the color you want with your nail polish.
Let dry for at least 2 minutes, then cover it with your top coat.
Once it's dry, push the earring through the bead cap and attach it with a dab of glue so that it won't slide on and off.
Now you are done!
 
The color came out to be sooo beautiful and vibrant that I want to paint my nails in that color too! I can't wait to wear these earrings to school.
Speaking of school...exams will start to come up again next week so I will be very busy till the easter holidays. But I will try to post on a regularly basis, so look forward to it!


Saturday, February 07, 2015

Light Blue Beads Necklace | DIY

 
Today I want to share with you a cute, little AND fast DIY that you can make in less then 5 minutes!

With the sun coming out more and more each day, it becomes easier to fight the winter blues. Nevertheless, I still spend a lot of time inside due to the cold and I get bored easily. I start surfing through the Internet, searching for inspiration. It was then that I found this dainty pendant necklace on a Korean website, which I saw pretty often floating around in Pinterest recently, too. It looked so easy to make, hence why should I pay for it when I can do it myself?
So, as to combat (maybe) your boredom, too, read on!

 
What you need:

Jewelry Pliers
Chain
Eye Pin
Crystal Beads (mine are light blue)
Step-by-Step:
Start by inserting the crystal beads onto the eye pin. Mine were small enough to fit in 7 beads.
Create a loop with your jewelry plier and attach the chains.
Now you only have to add a lobster claw and you are done!
 

I'm very happy with the result and I will wear this necklace a lot. I think it just complements every outfit without standing out that much.
What do you think? It takes no time at all and it's simple as well!


Thursday, January 22, 2015

DIY: Pearl Bow Necklace


I love jewelry. I love wearing them and I love making them.
Have I already mentioned that I love them?

When I was a child, my father endowed me the best necklace - and my very first one. Since then, I adored everything that sparkles and glitters. My passion towards it grew big enough to make me want to craft jewelry myself. I've already made some creations for my friends who were willing to buy them and sometimes I would sit down and craft one as a birthday gift. So today, I will present you a piece of jewelry I created for one of my dear friends.


-Start by folding your wire in half and create a small loop by twisting it.
-Thread the pearls and the rhinestone.
-Continue to thread the pearls, then bend the wire and thread it through the other side of the rhinestone.
-Do the exact same thing to the other side, thread the wire through the rhinestone again, add the pearls and create another loop to prevent the pearls from slipping.
-Done!


I added a small section of rhinestones to either side of the bow and attached a chain. By making your bow smaller, you can wear it as a bracelet or as a brooch.
Happy DIYing!

Monday, January 05, 2015

Morse Code Bracelet


First of all: I wish you all a Happy New Year!

This post is going to be my first in 2015, so I thought I should do something more personal and of note. Lately, I've been obsessed with rare words and their meaning. Trying to embed a word in your craft has been hard, but I've come up with an idea. How about morse codes?

The word MERAKI is written in morse codes. It means: the soul, creativity, or love put into something; the essence of yourself that is put into your work.
 When I read this word for the first time, I knew that it would be the right one for 2015. It describes exactly what I feel and what I want to do for the coming months. Becoming more passionate about my blog, but also about school and my surroundings are one of my resolutions.


What you need:
wire
jewelry pliers
thread
sharpie

Step-by-Step:
Cut your wire (around 4" long).
Draw the morse codes on/around your wire.
Bend the wire and create small loops at the ends with your pliers.
Take two pieces of thread, pull them through the loops and tie a knot.
Finished.


  This DIY is soo easy and it only took me around 10 minutes to make!
I already look forward to seeing my friends question me what these black stripes and dots mean.

What would be your word of the year?


Monday, December 29, 2014

Twisted Gold Bow Bangle


Hey there!
As I did my usual before-I-go-to-bed-routine by surfing through the Internet (I'm looking at YOU Pinterest!), I spotted a bow bracelet from Kate Spade.
Here is the link to today's DIY inspiration:
I mean: Isn't that just adorable?!
Gold? Check. A bow? Check. A bracelet? Check.
 
Read on to see how I tried to copy this and change it into my own version:
 
 
What you need:
Gold wire
Jewelry pliers
Hot glue gun
Scissors
Velvet band in the color of your choice (mine is deep purple)
 
How to:
Start by cutting two 11'' (around 30cm) long pieces of wire.
Fold each of them in half and create a small loop. Now start twisting till you reach the ends.
Take the ends and create two loops, each facing another direction.
Next, grab the end of one loop, wrap it around the center of both and bend over.
If the ends are too rough, sand them or dip them in nail polish.
Then, bend the other ends with the small loops so that the bangle will fit your arm wrist.
Cut two pieces of the velvet band, pull them through the small loops, dab hot glue at the ends of the band, fold them over and press.
Whenever you want to wear this bracelet, tie the ends of the velvet band together.
 
Le fin.